이 프로젝트는 결과적으로 사운드를 측정하여
실시간으로 주변 소리 크기를 스마트폰으로 볼 수 있는 시스템을 만드는 것입니다.
APM(아파치, php, mysql)을 사용했고
php는 PDO를 이용하였습니다.
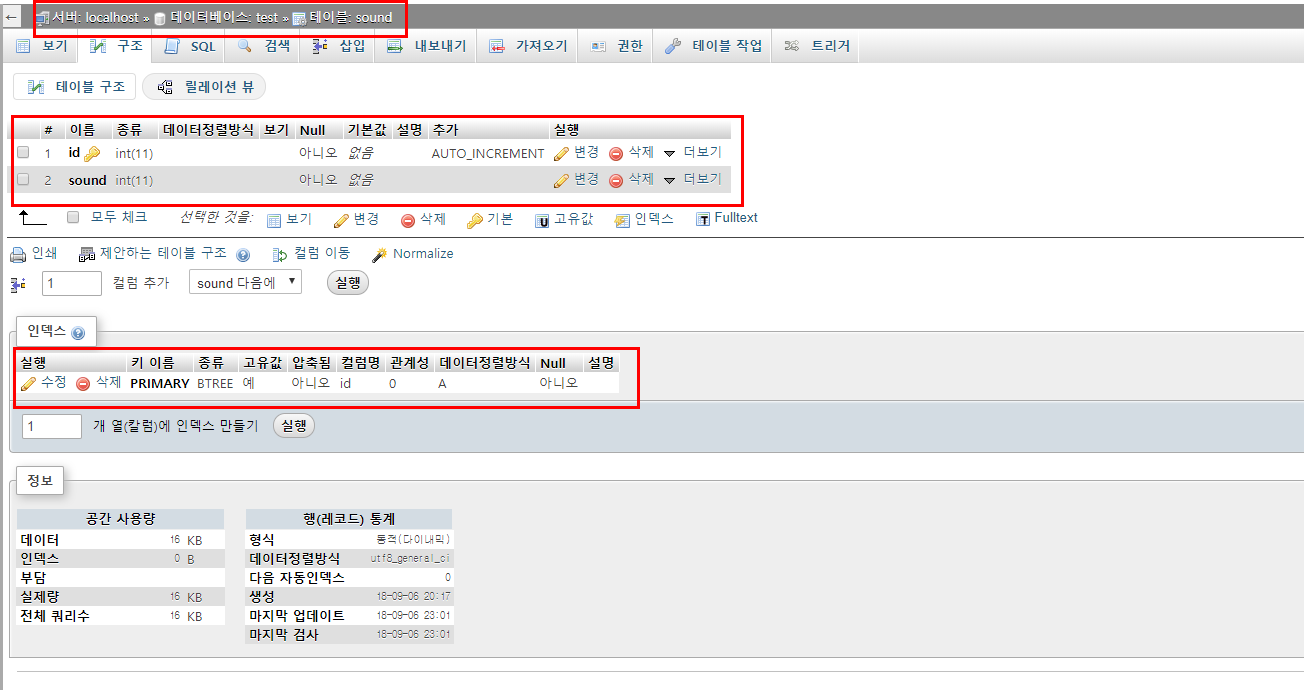
1. mysql에 데이터베이스, 테이블을 만들었습니다.
저는 phpmyadmin을 이용해 만들었습니다.
설치 및 사용법은 구글링을 추천합니다.
데이터베이스 이름은 test
table이름은 sound입니다.
2. PHP파일을 만들어야 합니다.
그 전에 PDO를 사용하기 위해선 php.ini 파일에
extension=php_pdo_mysql.dll
를 추가해줍니다.
주석처리가 되어있다고 하는데 저는 '찾기'해도 안나와서
직접 입력했습니다.
PHP파일은 htdocs안에 test1.php로 만들었습니다.
test1.php 내용은 다음과 같습니다.
<?php//자신의 양식에 맞게 입력하세요$mysql_hostname = 'localhost';$mysql_username = '사용자 이름';$mysql_password = '비밀번호';$mysql_database = 'test';$mysql_port = '3306';$mysql_charset = 'utf8';$dsn = 'mysql:host='.$mysql_hostname.';dbname='.$mysql_database.';port='.$mysql_port.';charset='.$mysql_charset;$temp = $_GET['d']; //get방식으로 값을 받을겁니다.try{$connect = new PDO( $dsn, $mysql_username, $mysql_password );$connect->setAttribute(PDO::ATTR_ERRMODE, PDO::ERRMODE_EXCEPTION);$sql = "INSERT INTO sound (sound) VALUES ('$temp')";//sound 테이블안에 sound 자리에 get방식으로 받은 값을 넣을겁니다.$connect->exec($sql);echo "New record created successfully";}catch ( PDOException $e ){echo 'Connect failed : ' . $e->getMessage() . '';return false;}$connect = null;?>
3. 아두이노 IDE를 이용해 코드를 업로드 합니다.
파일 - 예제 - esp8266httpclient - basichttpclient 를 클릭합니다.
저는 wemos D1 R1 보드이므로 저렇게 설정을 했습니다.
다른 보드를 사용중이라면 그에 맞는 설정을 해주시기 바랍니다.
코드 수정은 2가지만 하면 됩니다.
WiFiMulti.addAP("와이파이이름", "와이파이 비밀번호");
http.begin("http://자신서버IP/test1.php?d="+String(temp));
자신서버IP는 cmd창에서 ipconfig를 입력해 IPV4를 보면 됩니다.
(예를 들어 192.168.x.x)
그 후에 업로드를 합니다.
정상적으로 동작하면 시리얼 모니터에 다음과 같은 화면이 나옵니다.
mysql에 들어가면 id는 하나씩 늘어나고
sound값이 들어오는 것을 볼 수 있습니다.
이를 이용해 여러개의 아두이노에서 mysql로 데이터를 보낼 수 있습니다.
The project will eventually measure the sound,
and It is to create a system that can see the surrounding sound volume on the smartphone in real time.
I used APM (Apache, php, mysql)
php used PDO.
1. I created a database, table in mysql.
I created it using 'phpmyadmin'.
Installation and usage is recommended for Google.
The database name is 'test'
The table name is 'sound'.
2. You need to create a PHP file.
Before you can use PDO, you need to use 'php.ini'
extension = php_pdo_mysql.dll
Will be added.
It's commented out, but I can not find it.
So, I entered it myself.
The PHP file was created as 'test1.php' in 'htdocs'.
The contents of 'test1.php' are as follows.
<? php
// fill in your form
$ mysql_hostname = 'localhost';
$ mysql_username = 'username';
$ mysql_password = 'Password';
$ mysql_database = 'test';
$ mysql_port = '3306';
$ mysql_charset = 'utf8';
$ dsn = 'mysql: host ='. $ mysql_hostname. '; dbname ='. $ mysql_database. '; port ='. $ mysql_port. '; charset ='. $ mysql_charset;
$ temp = $ _GET ['d']; // Get the value in get method.
try
{
$ connect = new PDO ($ dsn, $ mysql_username, $ mysql_password);
$ connect-> setAttribute (PDO :: ATTR_ERRMODE, PDO :: ERRMODE_EXCEPTION);
$ sql = "INSERT INTO sound (sound) VALUES ('$ temp')";
// In the sound table, we will put the value we got in the sound place in the get method.
$ connect-> exec ($ sql);
echo "New record created successfully";
}
catch (PDOException $ e)
{
echo 'Connect failed:'. $ e-> getMessage (). '';
return false;
}
$ connect = null;
?>
3. Upload the code using the Arduino IDE.
Click File - Example - esp8266httpclient - basichttpclient.
I set it up because it is a wemos D1 R1 board.
If you are using another board, please make the appropriate setting.
There are only two code modifications.
WiFiMulti.addAP ("WiFi name", "WiFi password");
http.begin ("http: // your own server IP / test1.php? d =" + String (temp));
For your own server IP, look at IPV4 by typing 'ipconfig' in the cmd window.
(For example, IPv4 :192.168.x.x)
Then upload.
If it works normally, the following screen appears on the serial monitor.
Once in mysql, the 'id' is incremented by one
You can see the 'sound' value coming in.
You can use this to send data from multiple Arduino to mysql.


No comments:
Post a Comment